
When we start our Windows XP machine, many errors and faults start with our programs which are main cause of Low speed of our computer. Below are some important and useful steps for running your XP machine faster.
1. Setup XP boot time
? Go to Start button
? Click on Run
? Type Msconfig in Text box
? Click on BOOT.INI
? Set Timeout from 30 to 3 Seconds.
? Click Ok

After doing this method your Windows XP will Boot faster.
2. Disable Index services
? Go to Control panel
? Open Add or Remove programs
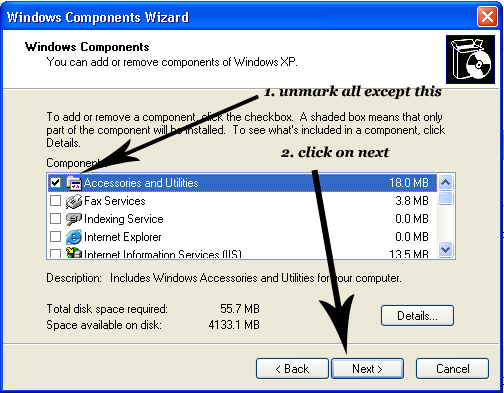
? Click on Add/Remove Windows components button.

? When you will click on Add/Remove Windows components, a box will appear.
? Uncheck all Components except Accessories and Utilities
? Click Next
Now you have Done.
3. Uncheck Automatic Folder Searching
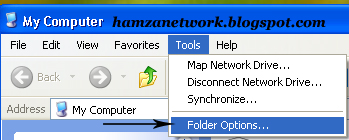
? Open My Computer
? Click Tools
? Click Folder option
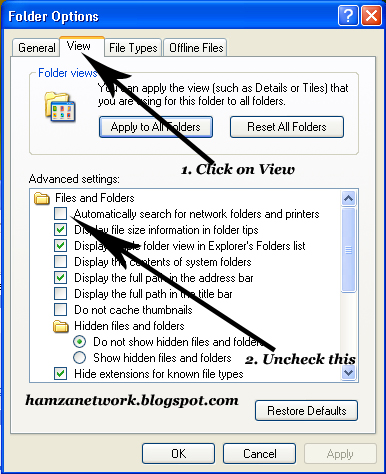
? When you will click on Folder option, a box will appear.
? In box click on View
? Uncheck Automatically search for network folders and printers and Click Ok.
4. Disable Graphic Properties
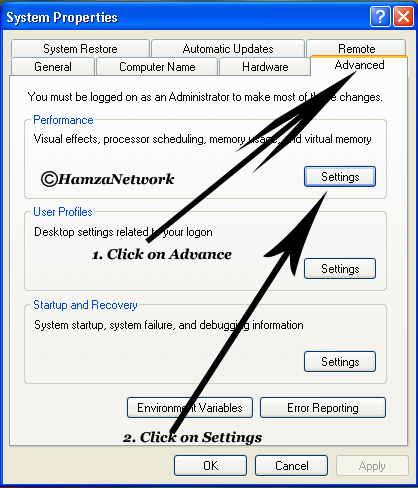
? Right Click on My Computer
? Click Properties
? Click on Advance Tab
? In Performance Section, Click on Settings
? When you will click on Settings, a box will appear.
? On Visual Effects section, Click on Custom and uncheck all Effects except 1,5,14,15,16 Effects
? Click Ok
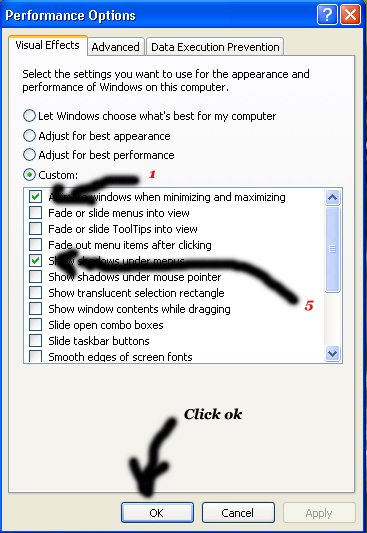
Done.
5. Turning off System Restore
? Now Go to My Computer properties.
? Click on System Restore and check Turn off System Restore on All Drivers
? Click Ok

6. Turning Off Automatic Updates
? Open My Computer Properties
? Click on Automatic Updates
? Check Turn off Automatic Updates and Click ok.

7. Turning off Firewall
? Go to Control Panel
? Click on Windows Security Center
? Click on Windows Firewall Placed on Bottom Middle In box
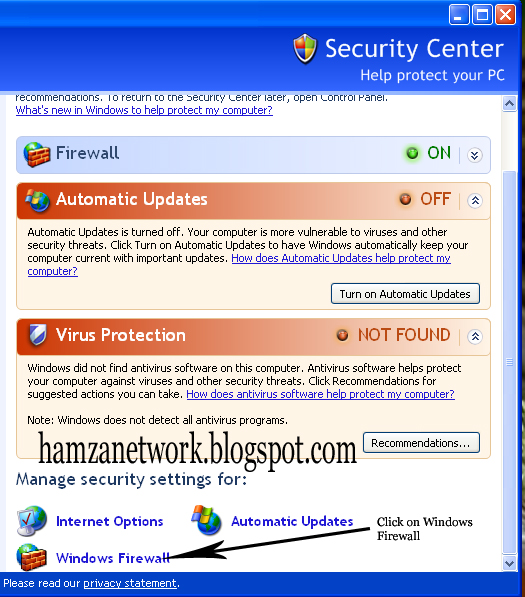
? When you will click on Windows Firewall, A box will appear.
? Check Off (not recommended) and Click Ok.
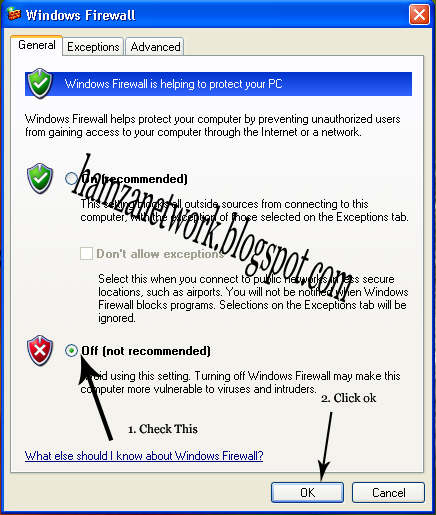
? Restart your Computer to Apply all Changes.
? Visit my facebook fan page for more Tips. http://facebook.com/HamzaNetwork
If You have any problem about this topic or ask anything from me then comment below.


